air filter

When is it recommended to replace the car air filter

Typically, it’s recommended to change a car’s air filter every 12,000 to 15,000 miles or once a year, whichever comes first. However, if you often drive on dusty or unpaved roads, you may need to change it more frequently. It’s also a good idea to double-check your car’s owner manual for the manufacturer’s recommended replacement schedule.

How to change the air filter

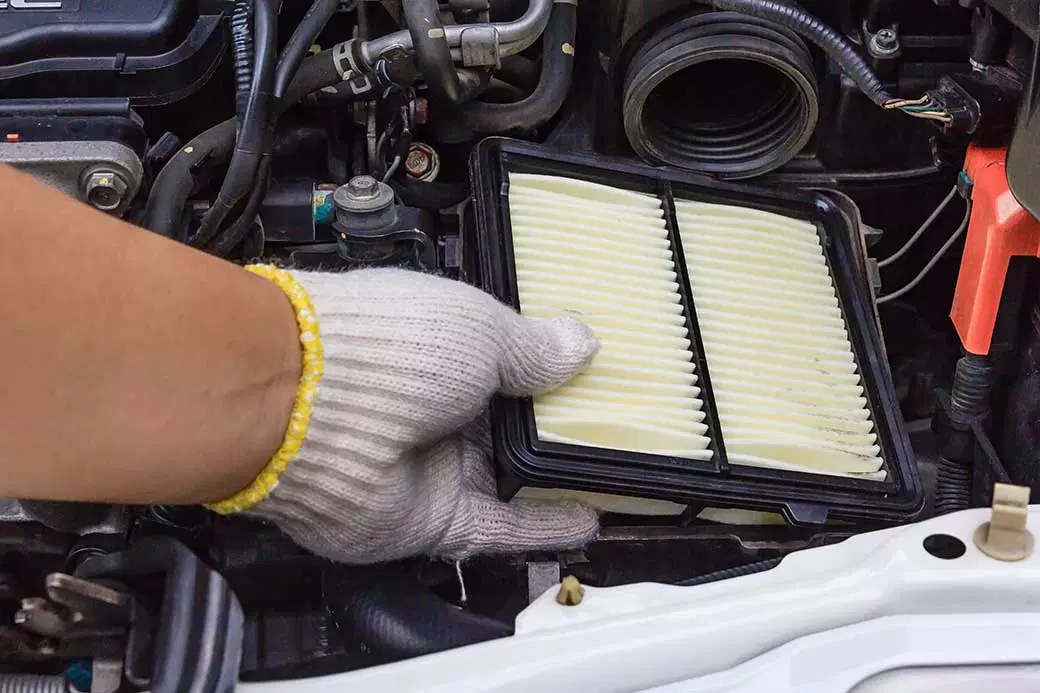
  1. Open the hood of your car and locate the air filter housing. It’s usually a black plastic box with a large hose leading to the engine.
  2. Unscrew the clips or screws that hold the housing in place. Most cars have four clips, but the location and number may vary depending on your car’s make and model.
  3. Lift the housing cover off and remove the old air filter. Take note of the direction of the old filter, if it’s a paper filter, so you know how to position the new one.
  4. Take the new filter out of its packaging and compare it to the old one to make sure it matches in size and shape.
  5. Place the new filter into the housing, making sure it’s seated properly. Make sure that any tabs or holding frames are aligned with the housing.
  6. Replace the housing cover and secure it in place with the clips or screws you removed earlier.
  7. Close the hood of your car.

That’s it! You should now have a clean air filter installed in your car, which will help improve your car’s air quality, performance, and gas mileage

conditioner filter

When is it recommended to replace the car air conditioner filter

It is generally recommended to replace the car cabin air filter every 15,000 to 30,000 miles or every 12 to 18 months, whichever comes first. However, this can vary depending on your driving conditions, so it’s always best to consult your car’s owner manual for specific instructions. Additionally, you may want to consider replacing the air filter more frequently if you frequently drive in dusty or polluted areas.

What are the steps to change the air conditioning filter in a car

  1. Locate the air filter compartment: The air filter compartment is usually located in the engine bay or under the dashboard on the passenger side.
  2. Remove the old filter: Undo the clips or screws that are holding the filter in place and carefully slide it out of the compartment.
  3. Clean the air filter compartment: Use a vacuum cleaner or soft-bristled brush to remove any debris or dirt in the compartment. Wipe it down with a damp cloth if necessary.
  4. Install the new filter: Install the new filter in the same position and orientation as the old one. Make sure it fits securely in the compartment.
  5. Close the compartment: Secure the clips or screws back in place to close the compartment.
  6. Test the air conditioning: Turn on the air conditioning to ensure that it’s working properly and that the new filter is allowing clean air to flow through the system.

Note that specific steps may vary depending on the make and model of your car. It’s always a good idea to consult your car’s manual for detailed instructions.

fuel filters

When is it recommended to replace the fuel filters

The recommended interval for fuel filter replacement can vary depending on the make and model of the vehicle. As a general guideline, it is recommended to replace the fuel filter every 30,000 to 40,000 miles or every 3 years, whichever comes first. However, you should always refer to the manufacturer’s recommendations for your specific vehicle to ensure proper maintenance. Additionally, if you notice any symptoms of a clogged fuel filter, such as loss of power or a rough idle, it is best to have the fuel filter inspected and replaced if necessary.

What are the steps to change the fuel filters

  1. Locate the fuel filter(s) in your vehicle. Consult the owner’s manual or online resources to find their location.
  2. Depressurize the fuel system. This involves removing the fuel pump fuse or relay, then starting the engine and allowing it to stall out due to lack of fuel pressure.
  3. Remove the hoses or lines connected to the fuel filter. Make sure to place a pan or bucket underneath to catch any fuel that may spill out.
  4. Remove the old fuel filter(s) and discard properly.
  5. Install the new fuel filter(s) in their place, making sure to orient them correctly according to the manufacturer’s instructions.
  6. Reconnect the hoses or lines to the new fuel filter(s), being careful to tighten the connections securely.
  7. Reinstall the fuel pump fuse or relay, then start the engine and check for leaks at the fuel filter connections.

Finally, test-drive the vehicle to make sure the fuel system is working properly and the engine is running smoothly.

oil filters

When is it recommended to replace the oil filters

It is generally recommended to replace oil filters every time you change your engine oil, which is typically every 5,000 to 10,000 miles or every six months, whichever comes first. However, it’s always a good idea to check your vehicle’s owner manual for specific manufacturer’s recommendations.

What are the steps to change the oil filters

  1. . Choose the replacement oil filter: Before you start, ensure that you have the right oil filter for your car’s make and model. You should be able to find this information in your car’s manual or by checking with your local auto parts store.
  2. Gather the necessary tools: You will need a wrench, an oil filter wrench, a drain pan, and some rags.
  3. Locate the oil filter: The oil filter is located underneath the car. Typically, you will find the filter near the bottom of the engine, either at the front or back of the engine block.
  4. Drain the oil: Before you remove the oil filter, you will need to drain the old oil. Locate and remove the oil drain plug or valve to release the old oil from the engine. Make sure you have a drain pan underneath to catch the oil.
  5. Remove the old oil filter: Once the oil has drained, locate the oil filter and use an oil filter wrench to loosen and remove the filter. Make sure to use a rag to clean any dirt or debris from the area around the filter to avoid introducing any contaminants into the engine.
  6. Install the new oil filter: Apply a thin coat of oil on the rubber gasket of the new filter to ensure a tight seal. Screw the new filter onto the engine by hand until it is hand-tight.
  7. Refill the engine with oil: Replace the drain plug or valve and refill the engine with the recommended amount of fresh oil. Check the oil level with a dipstick to make sure it’s at the recommended level on the dipstick.
  8. Start the engine and check for leaks: Start the engine and let it run for a few minutes. Turn off the engine and check for any oil leaks around the filter or drain plug. If you notice any leaks, tighten the component or replace the gasket.